


BRIEF:
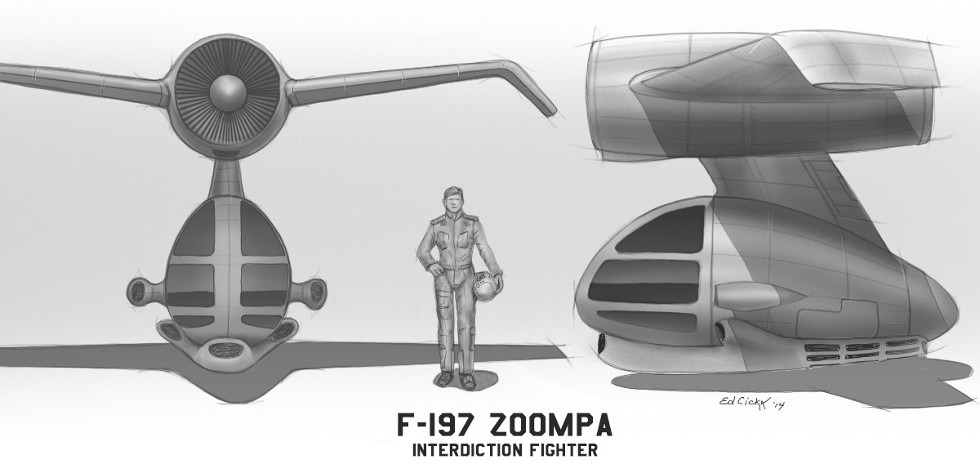
The IF-197 "ZOOMPA" is single person craft built by Universal-Motion under contract to the Crithlon Global Government (CGG). The Interdiction Fighter (IF) primary use is to patrol lightly defended areas of the DMZ. Armament on the IF-197 includes two forward firing Phoenix 430 pulse laser weapons in side-mounted pods and a complete Specific Electric Mark 92 Electronic Counter Measures (ECM) suite mounted in a rear radome. Constructed of lightweight alloys and composites and powered by a Yanzanto AG14.5 limited altitude anti-gravity pod and a single W & P J940 Ziliumin fueled turbo fan, these craft are highly maneuverable. Because of their lack of sophisticated avionics and very few moving parts, they have very low maintenance and repair costs.
As peace starts to settle on Crithlon, there has been less and less need for the 15,000 serviceable ZOOMPA craft available. In an attempt to recoup some of the money spent in manufacturing, the CGG is starting to sell airworthy ZOOMPA Airframes, sans armaments, to interested individuals. With the armaments removed, the aircraft, which are already nimble, becomes extremely exciting to fly. Ad-hoc ZOOMPA pylon and obstacle course races are starting to occur in the more desolated areas of the planet, much to the chagrin of the local police forces, who are often called out to break up the races, but find that their own vehicles are less than a match for the ZOOMPAs they are trying to catch!
Because of concern of potential legal action, the CGG has set new regulations that the purchaser of a ZOOMPA must prove that they will not use the aircraft for illegal racing, and sign an affidavit under penalty of perjury (a potential life sentence if convicted) to the same. But even these requirements cannot stop the sale and use of ZOOMPAs for racing. It will not be too long before someone with enough money and clout is killed in one of these races and the family sues the CGG for their loss.
WORKFLOW:
This idea started from a brief for a military aircraft that is being used as a race aircraft too, similar to the way that WWII aircraft are used in Reno style air races. Initial drawings were accomplished and helped better define the craft, which was to be small, simple and nimble.
A major problem appeared with the initial drawings in that the aircraft did not look flight worthy. The aerodynamics just would not work as pictured. An "anti-gravity" engine became the compromise to deal with the lift issue. Now the aerodynamics of the craft needed to deal with maneuverability only.
After finalizing on a design, the creation of the ship asset began. The tool of choice for model creation was Blender. The model is highly detailed with a great deal of small controls, clamps, fasteners, air ducts, hoses, fittings, avionics and other details, making this a relatively heavy model.
To color and add detail to the exterior of the aircraft, UV maps were generated. Two types of maps were created, one for color the other for bump. The military color scheme is based upon several different schemes used on German aircraft during World War II. The bump maps created panel lines, rivets, hatches and other surface details. Decals using textures positioned using Empty objects provide the fine details necessary to bring the ship to life.
After some of the initial rendering was done, I decided to see what the model would look like printed in 3D. The process involved taking the 3D model assets from Blender and cutting it up into parts that would easily render on a 3D printer. Since the detailed model had already been created, the 3D model needed to be simplified to hit the resolution and size of the printer bed. The model was eventually broken down into these segments:
- Engine front and back with wing fairing
- Left and right inner wing panels
- Left and right out wing panels
- Sail (section between fuselage and engine)
- Crew compartment front (nose to front edge of door)
- Crew compartment back
- Fuselage sans rear radome
- Rear radome
- Antigravity unit front intake
- Antigravity unit
- Left and right gun pods
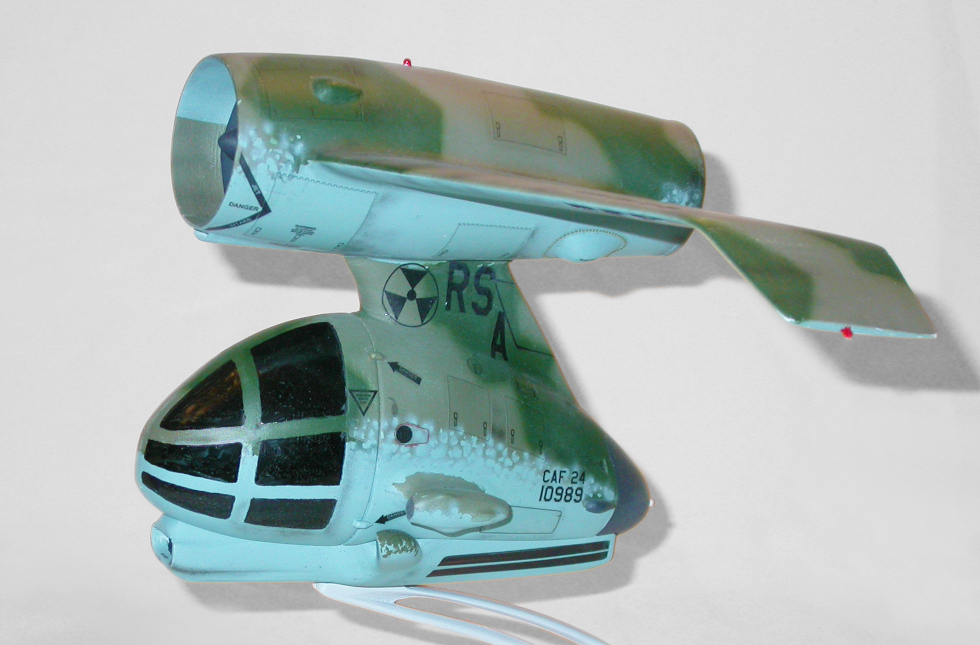
I printed all the parts in ABS plastic, which is a good medium because you can use regular plastic model glue and filler, and you can use acetone to slightly melt the plastic to fill in the grain left by the printer.
After the pieces were assembled, filled, sanded and primed, I painted it to look like the renders I had created in Blender. To get the fine detail, I was able to create "water slide" decals using an inkjet photo printer, special paper and the decal images I created in Photoshop for the 3D render. Just like with the 3D renders, the decals added that final touch of detail to the finished model and since I was able to use the images I had already created for the 3D asset in blender, I also got a great deal of reuse.
The next item I wanted to cover was the IF-197 on the flight line. I thought this would be a good opportunity to show off a lot of the hidden details, like avionics. I create ground support equipment models (Air conditioner/hoses, power cart, jack stand, fire extinguisher, and blast fence) in Blender using research of equipment and memories of my experiences working on the flight line while in the USAF.
An interesting item in this image is the "REMOVE BEFORE FLIGHT" flags. These flags were created using Blender's physical dynamic model to render cloth. Each flag is created and set at a location and given parameters about how stiff it is and what it will interact with. A wind source is added to the scene and then a short animation is run. Each flag moves independently based upon its location, wind direction, etc. Once I got the flags into positions I liked, I "baked" the scene which locks the geometry of the flags into position.
The two maintenance men as well as their uniforms are assets purchased from DAZ 3D and posed in DAZ | Studio. Once posed, the assets are exported out as objects and imported into Blender. I then did small pose correction in blender, applied the appropriate image and bump maps and rendered out the scene. Again, moving into Photoshop, I cleaned up the image, adding and subtracting some details and using a few filters to create a realistic image.
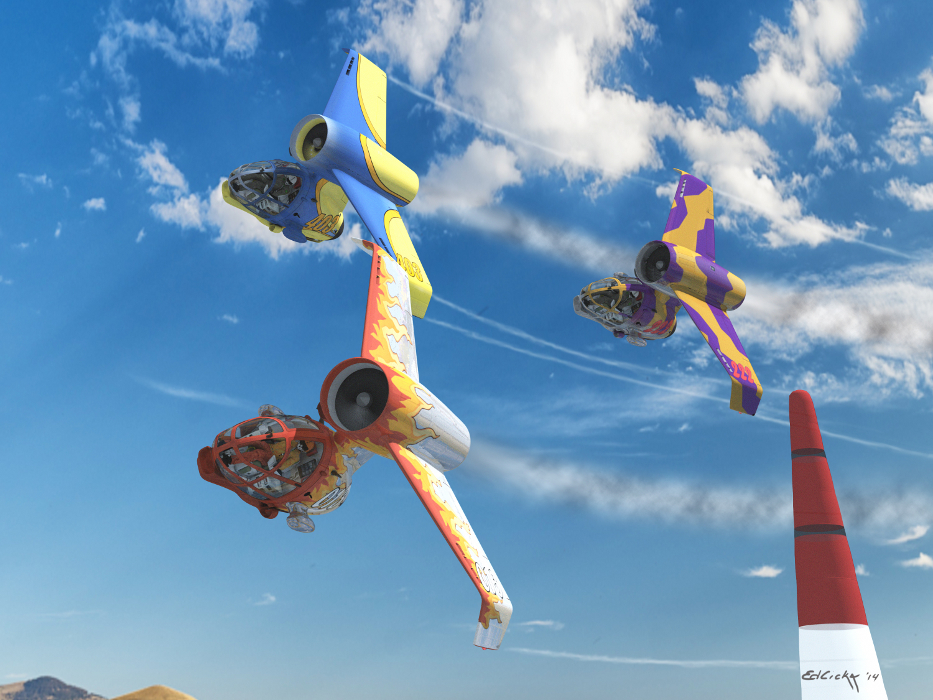
My final effort on this brief was to create a view of the IF-197 racing in Reno air races like event. I did a lot of research on paint schemes on current air race aircraft and found three that I really liked. Since I had already created images to UV wrap on the 3D model to create the camouflage paint scheme, it was easy to create new images with the race colors. I had to create a few new decals, but the ease of changing the whole look of the airplane is pretty impressive.
Once the paint schemes were created, it was just a matter of creating a pylon (again using dynamic cloth), pose the aircraft and render. Some time in Photoshop adding smoke/contrails and adding a little motion blur was all that was needed to finish up the shot.